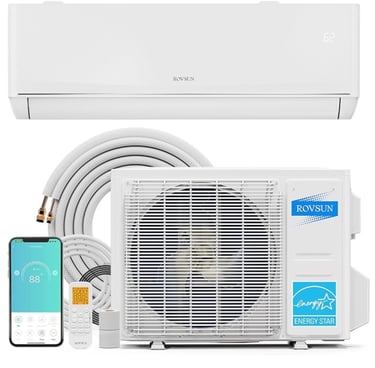
Installing a ductless mini split A/C for an office or bedroom or even a garage is easier than it seems here is a guide and list of products for a DIY A/C install!

TOOLS YOU WILL NEED
Drill with hole saw (usually 2.5”–3.5”)
Level
Stud finder
Tape measure
Screwdrivers
Adjustable wrenches
Line-set insulation tape
Wall sleeve (usually included)
Vacuum pump + gauge manifold (or hire a tech)
Flaring tool (if your unit doesn’t come pre-flared)
Electrical tools (wire stripper, connectors)
Outdoor pad or wall brackets
Line-set covers (optional but cleaner)
Choose the Right Location (Indoor Unit)
Mount high on the wall, away from direct sunlight.
Choose a spot with at least:
6–8 inches of clearance above the unit
6–12 inches on sides
Must allow a straight shot for the line-set to exit outside.
Install the Indoor Wall Bracket
Use a level to place the mounting bracket.
Secure it into studs or use proper anchors.
Make sure it’s sturdy — the indoor head will hang on this.
Drill the Wall Penetration
Drill a 2.5″–3.5″ hole through the wall at a slight downward angle outward for drainage.
Insert the wall sleeve to protect tubing and cable.
Prepare Indoor Unit Connections
Feed the following through the wall sleeve:
Refrigerant lines (carefully bend by hand)
Condensate drain line (must slope downward)
Communication/power cable (depending on model)
Hang the indoor head on the bracket.
Mount the Outdoor Unit
Place on a concrete pad or wall bracket.
Keep at least:
12–24 inches behind
24 inches in front
Make sure it’s level and clear for airflow.
Run the Line Set
Connect the refrigerant lines from indoor to outdoor.
Do NOT kink the copper.
Use gentle, wide bends only.
Insulate both lines well.
Use line-set covers or wrap with tape for protection.
Tighten flare nuts with two wrenches (one to hold, one to turn).
Be careful not to over-tighten.
Wire the System
Most systems use:
14/4 or 12/4 communication cable (indoor → outdoor)
Dedicated 240V circuit from breaker to outdoor unit
Wiring basics:
Connect terminals 1–1, 2–2, 3–3, ground–ground
Outdoor unit gets the main power
Indoor unit is powered by the outdoor
Always match the manual’s wiring diagram for your model.
Pull Vacuum on the Refrigerant Lines
If you’re not certified, hire an HVAC tech for this part.
A pro will:
Connect gauges
Connect vacuum pump
Pull vacuum to 500 microns or lower
Close valves and verify system holds vacuum (no leaks)
This step removes moisture and air from the lines.
Release Refrigerant
Once vacuum passes leak-down test, the tech will:
Open the service valves on the outdoor unit
This releases the factory refrigerant charge into the line-set.
Test and Start the System
Restore power
Set system to cool mode
Check:
Indoor airflow
Condensate drainage
Outdoor fan/compressor running
Line temperatures (suction line cool, liquid line warm)
Help
Questions? Reach out anytime, we're here.
Contact
Randy.collins@diyhvacservice.com
© 2025. All rights reserved.